Quilting Circle Embroidery Design Review
A Thoughtful First Impression
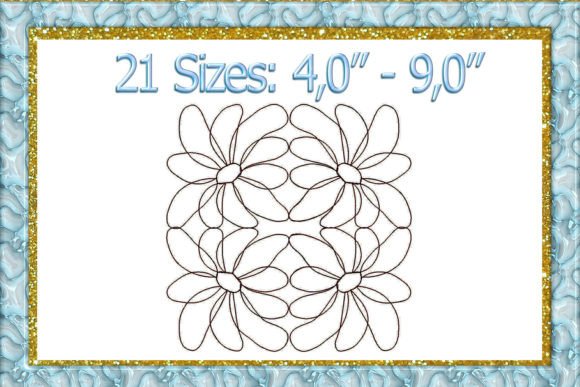
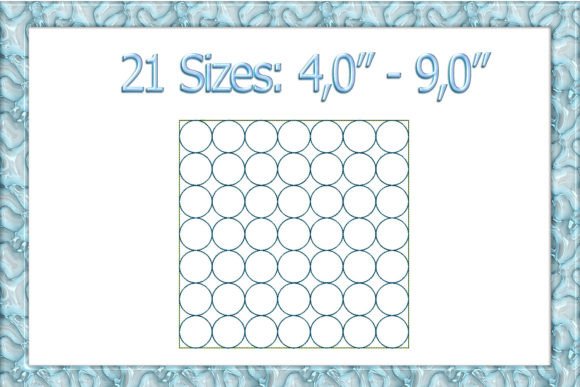
As an embroidery designer who’s stitched thousands of projects—from boutique aprons to nursery wall hangings—I opened the Quilting Circle Embroidery Design with quiet curiosity. Visually, it’s a soft, rhythmic stippling pattern that evokes hand-guided quilting: gentle concentric circles, subtle overlaps, and organic spacing. It doesn’t shout—it breathes. There’s no dense satin border or sharp geometry; instead, it leans into texture and movement. That makes it less of a focal-point motif and more of a grounded, tactile background—ideal for projects where you want elegance without distraction.
Where This Background Design Truly Shines
The Quilting Circle Embroidery Design fits naturally into handmade product categories where subtlety elevates perceived value. I tested it on a linen kitchen towel and a cotton baby blanket—and both felt instantly more intentional, like curated heirlooms rather than craft-store basics. It also translated beautifully onto a heavyweight sweatshirt cuff, adding dimension without bulk. Because it’s a Backgrounds-category Embroidery design, it’s not meant to stand alone as a logo or monogram. Instead, it layers gracefully beneath text, small applique elements, or even minimal topstitching.
For Etsy sellers and creative entrepreneurs, this is a quietly powerful asset. A pillow cover with the Quilting Circle Embroidery Design in one corner—paired with a tiny custom name in running stitch—reads as cohesive, professional, and thoughtfully designed. Same goes for tote bags: placed along the hem or subtly repeated across a canvas base, it adds rhythm without overwhelming the fabric’s natural drape.
Real-World Stitching Performance
I ran the Quilting Circle Embroidery Design on several substrates to assess practicality:
- Tote bags & aprons: Worked flawlessly on medium-weight cotton duck with tear-away + light cutaway stabilizer. The stippling stayed crisp, and thread tension held through dense zones.
- Sweatshirts & caps: On fleece-lined sweatshirts, I added a layer of fusible mesh stabilizer underneath—critical for preventing puckering in curved areas. On caps, I used a smaller hoop size (4" round) and stitched only the innermost two circles to avoid distortion on the crown.
- Baby items & kitchen towels: Performed well on 100% cotton terry and interlock knit—but only with proper stabilizer selection. Lighter versions needed cutaway; heavier terry tolerated tear-away plus topping.
- Dark fabric & textured surfaces: On navy twill, I switched to matte white thread for contrast and confirmed visibility before full production. On waffle-weave towels, I reduced stitch density slightly in my editing software (after checking the original file’s settings) to prevent skipped stitches.
What to Watch For Before You Stitch
This isn’t a “drop-in-and-stitch” file for every machine or fabric. Here’s what I recommend verifying before using the Quilting Circle Embroidery Design commercially:
- Test on scrap fabric first—especially if stitching on stretchy knits or high-pile textiles.
- Review stitch density: Stippling can pack tightly in small spaces. If your machine hesitates or threads break mid-design, consider reducing density by 5–10% in your embroidery software.
- Confirm hoop size compatibility: The design scales well, but very small hoops (under 3") may require cropping the outer rings—check how much detail remains legible after scaling.
- Match stabilizer to end use: For items that will be washed frequently (baby blankets, kitchen towels), opt for permanent cutaway over tear-away.
- Compare light/dark fabric mockups: Use printable mockups to preview how the stippling reads against your intended base color—not just thread color, but fabric texture and sheen.
- Inspect small details post-stitch: Zoom in on tight curves and overlapping circles. Some machines soften fine stipple transitions—adjust underlay or jump stitch settings if needed.
Impact on Your Handmade Business
Used intentionally, the Quilting Circle Embroidery Design strengthens buyer trust. Customers scrolling Etsy or browsing a craft fair notice cohesion—the way a quilted texture echoes on a matching pillow cover and tea towel signals care and continuity. It supports brand consistency without locking you into a single aesthetic: pair it with modern sans-serif lettering for apparel or delicate script for personalized gifts.
Photography improves too. The subtle texture catches light differently than flat fill stitch, adding depth to flat-lay shots and social media previews. And because it’s a digital embroidery file built for versatility—not just one-size-fits-all—it integrates cleanly into larger design systems: think coordinated collections for seasonal launches (spring garden sets, holiday kitchen bundles) or boutique merchandise lines.
Licensing & File Practicalities
The product listing states that nine machine embroidery formats are included—essential for multi-brand studios or teams using different machines. As with any Creative Fabrica embroidery purchase, I always double-check the license terms on the product page before applying the Quilting Circle Embroidery Design to finished products sold commercially. Licensing clarity matters most when offering embroidered patches or custom apparel at scale.
No file format, stitch count, or exact hoop dimensions were listed in the source description—so I advise reviewing those details directly on Creative Fabrica before committing to large batches. If your workflow includes digitizing adjustments (like adding underlay or smoothing jump stitches), confirm whether the native file allows editing—or if it’s locked to specific software.
A Final Note for Creative Entrepreneurs
The Quilting Circle Embroidery Design won’t replace your signature monogram or best-selling applique design—but it might become the quiet foundation that ties your entire catalog together. It’s the kind of embroidery file that makes a $28 pillow cover feel like a $48 heirloom piece, or turns a simple kitchen towel into a thoughtful, giftable staple. Used with intention—not as filler, but as texture—it earns its place in your design assets library. Just remember: respect the fabric, honor the stabilizer, test early, and let the stippling do what it does best—ground, unify, and quietly elevate.